Anyone else love coffee, tea or red wine but don’t enjoy the stains it leaves on your teeth? I’m a big tea and wine drinker and suffer the consequences with stained teeth (it definitely makes me self conscious but I do love my tea and wine). I was so excited to partner with Smile Brilliant to test out their whitening T3 Sensitive System with custom fitted trays AND we are doing a giveaway so you guys have the chance to win a free kit for yourselves (details further below).
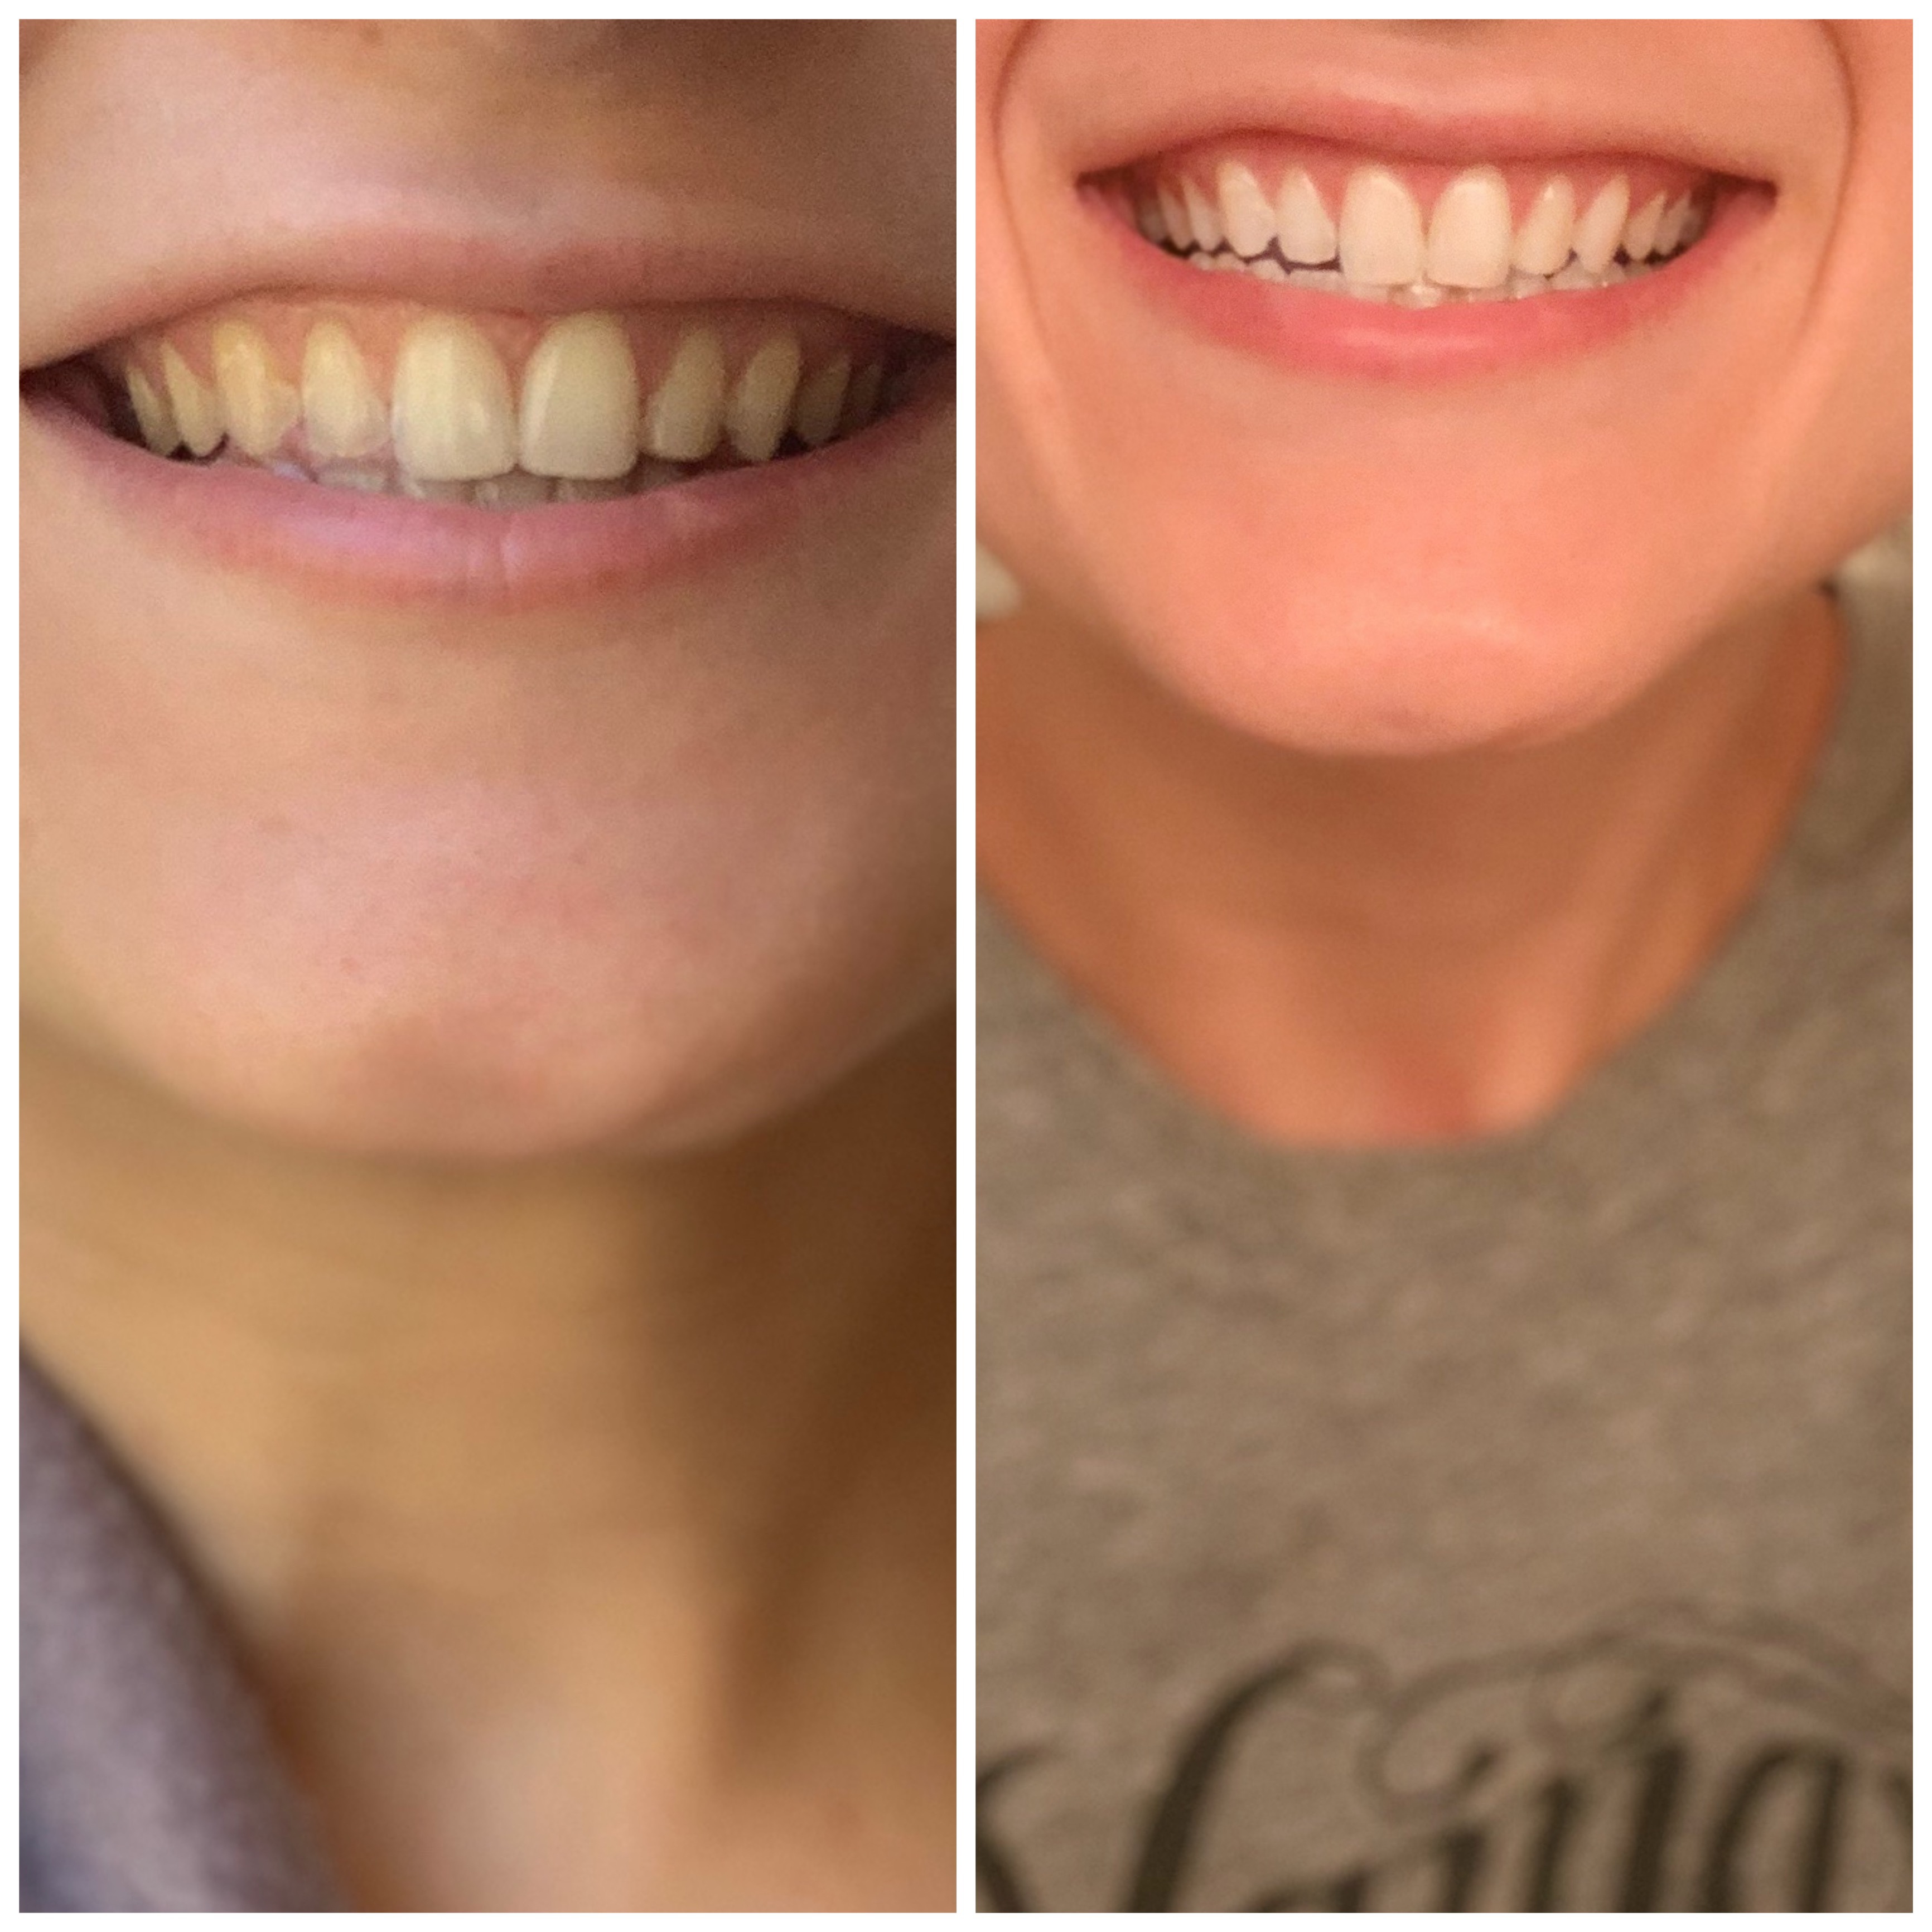
I’m excited to walk you guys through the whitening process and show you my before/after photos! I really started noticing results after 8 sessions of whitening. See the photos below and notice the difference for yourself!
Before/After (8 sessions):
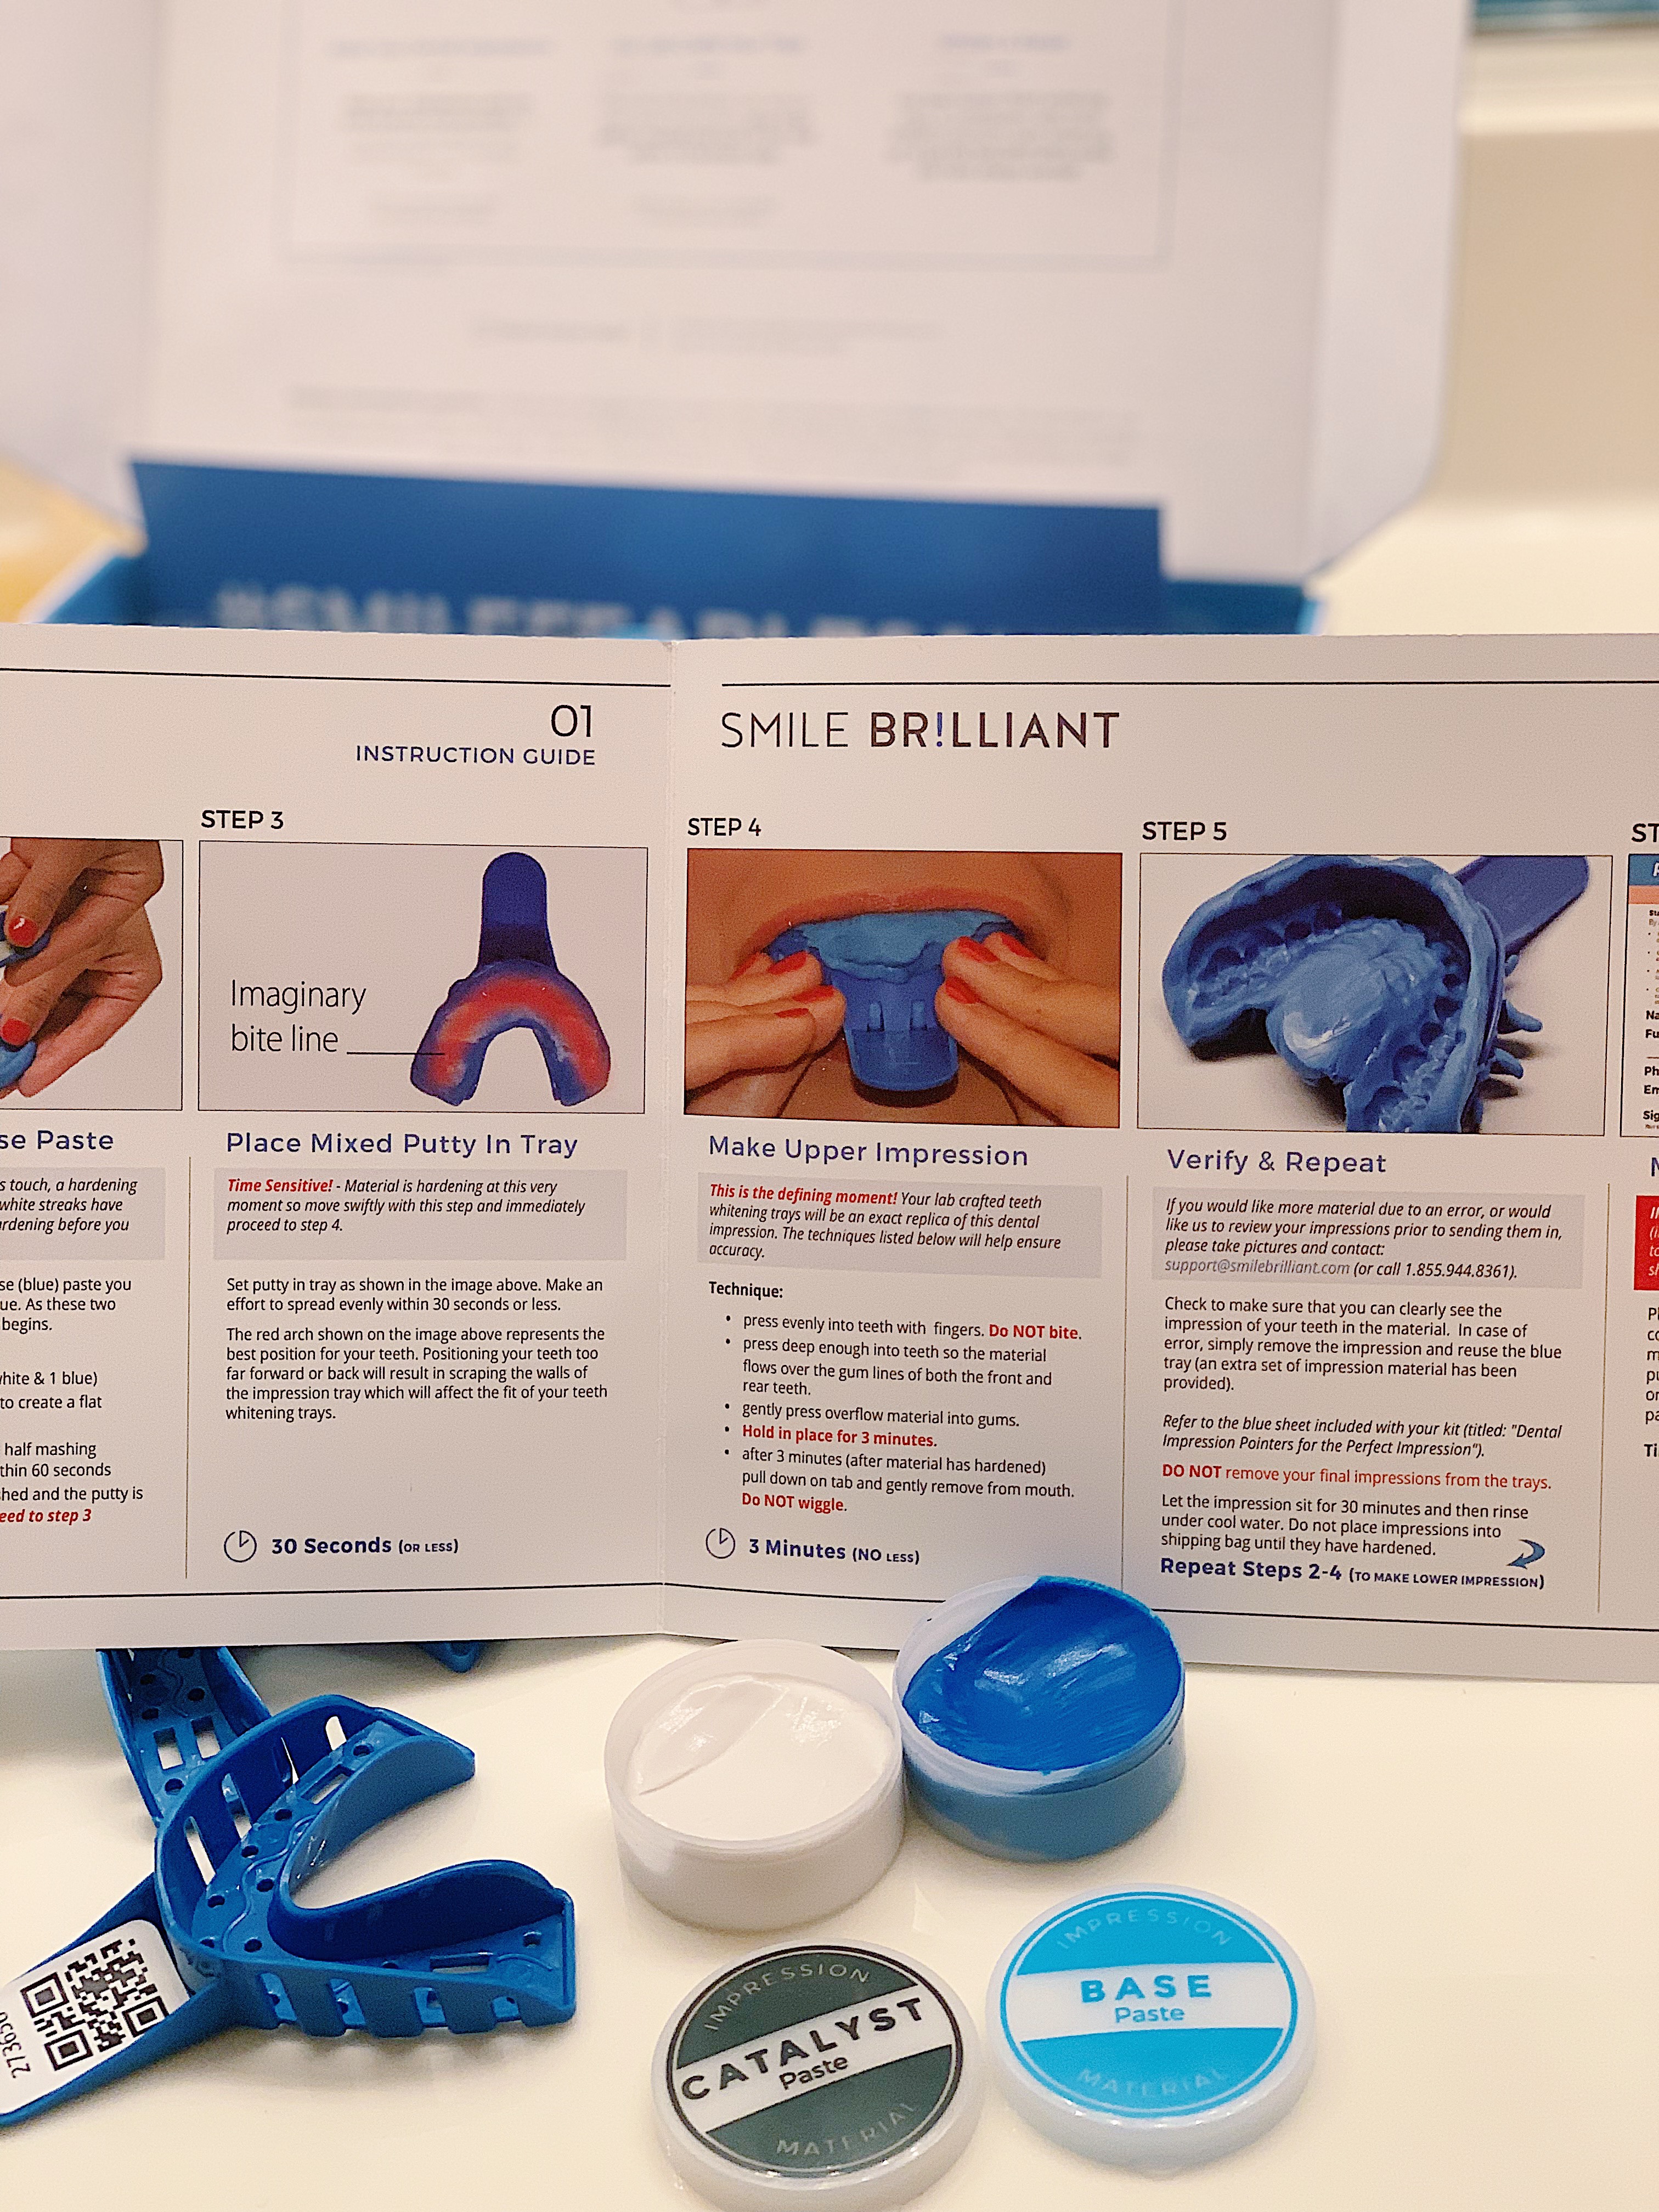
Before I get ahead of myself, I want to share the initial process of making my impressions for the custom fitted trays. I received my kit in the mail that had the putty and plastic trays to make the dental impressions along with the prepaid postage and packaging to mail them back in. They also include the whitening and desensitizing gel syringes in the initial package so you can hold onto those to use once you receive your custom fitted trays.

It was simple to make the top and bottom impressions myself while following their instruction guide and they send you extra putty in case you mess up (we’re all human, it happens). Once you mail-in your impressions, Smile Brilliant then creates your trays and mails them back in 3-5 business days.
Once the trays arrive in the mail, the real fun begins. I was excited to try my first whitening session right away. To start, brush teeth with only water and squeeze a thin layer of the whitening gel onto the top and bottom trays and keep on teeth for 45 mins-3 hours. The team at Smile Brilliant advised me to start at the lower end of the time range to gauge comfort level. Pro tip: coat gums in Vaseline if you have sensitive gums (like me).
Once you finish whitening, brush teeth with toothpaste, clean trays and squeeze a thin layer of the desensitizing gel in the trays and leave on for 15-30mins. Once you are finished, remove trays and clean them off. Store in the container for your next session! It’s seriously so easy.
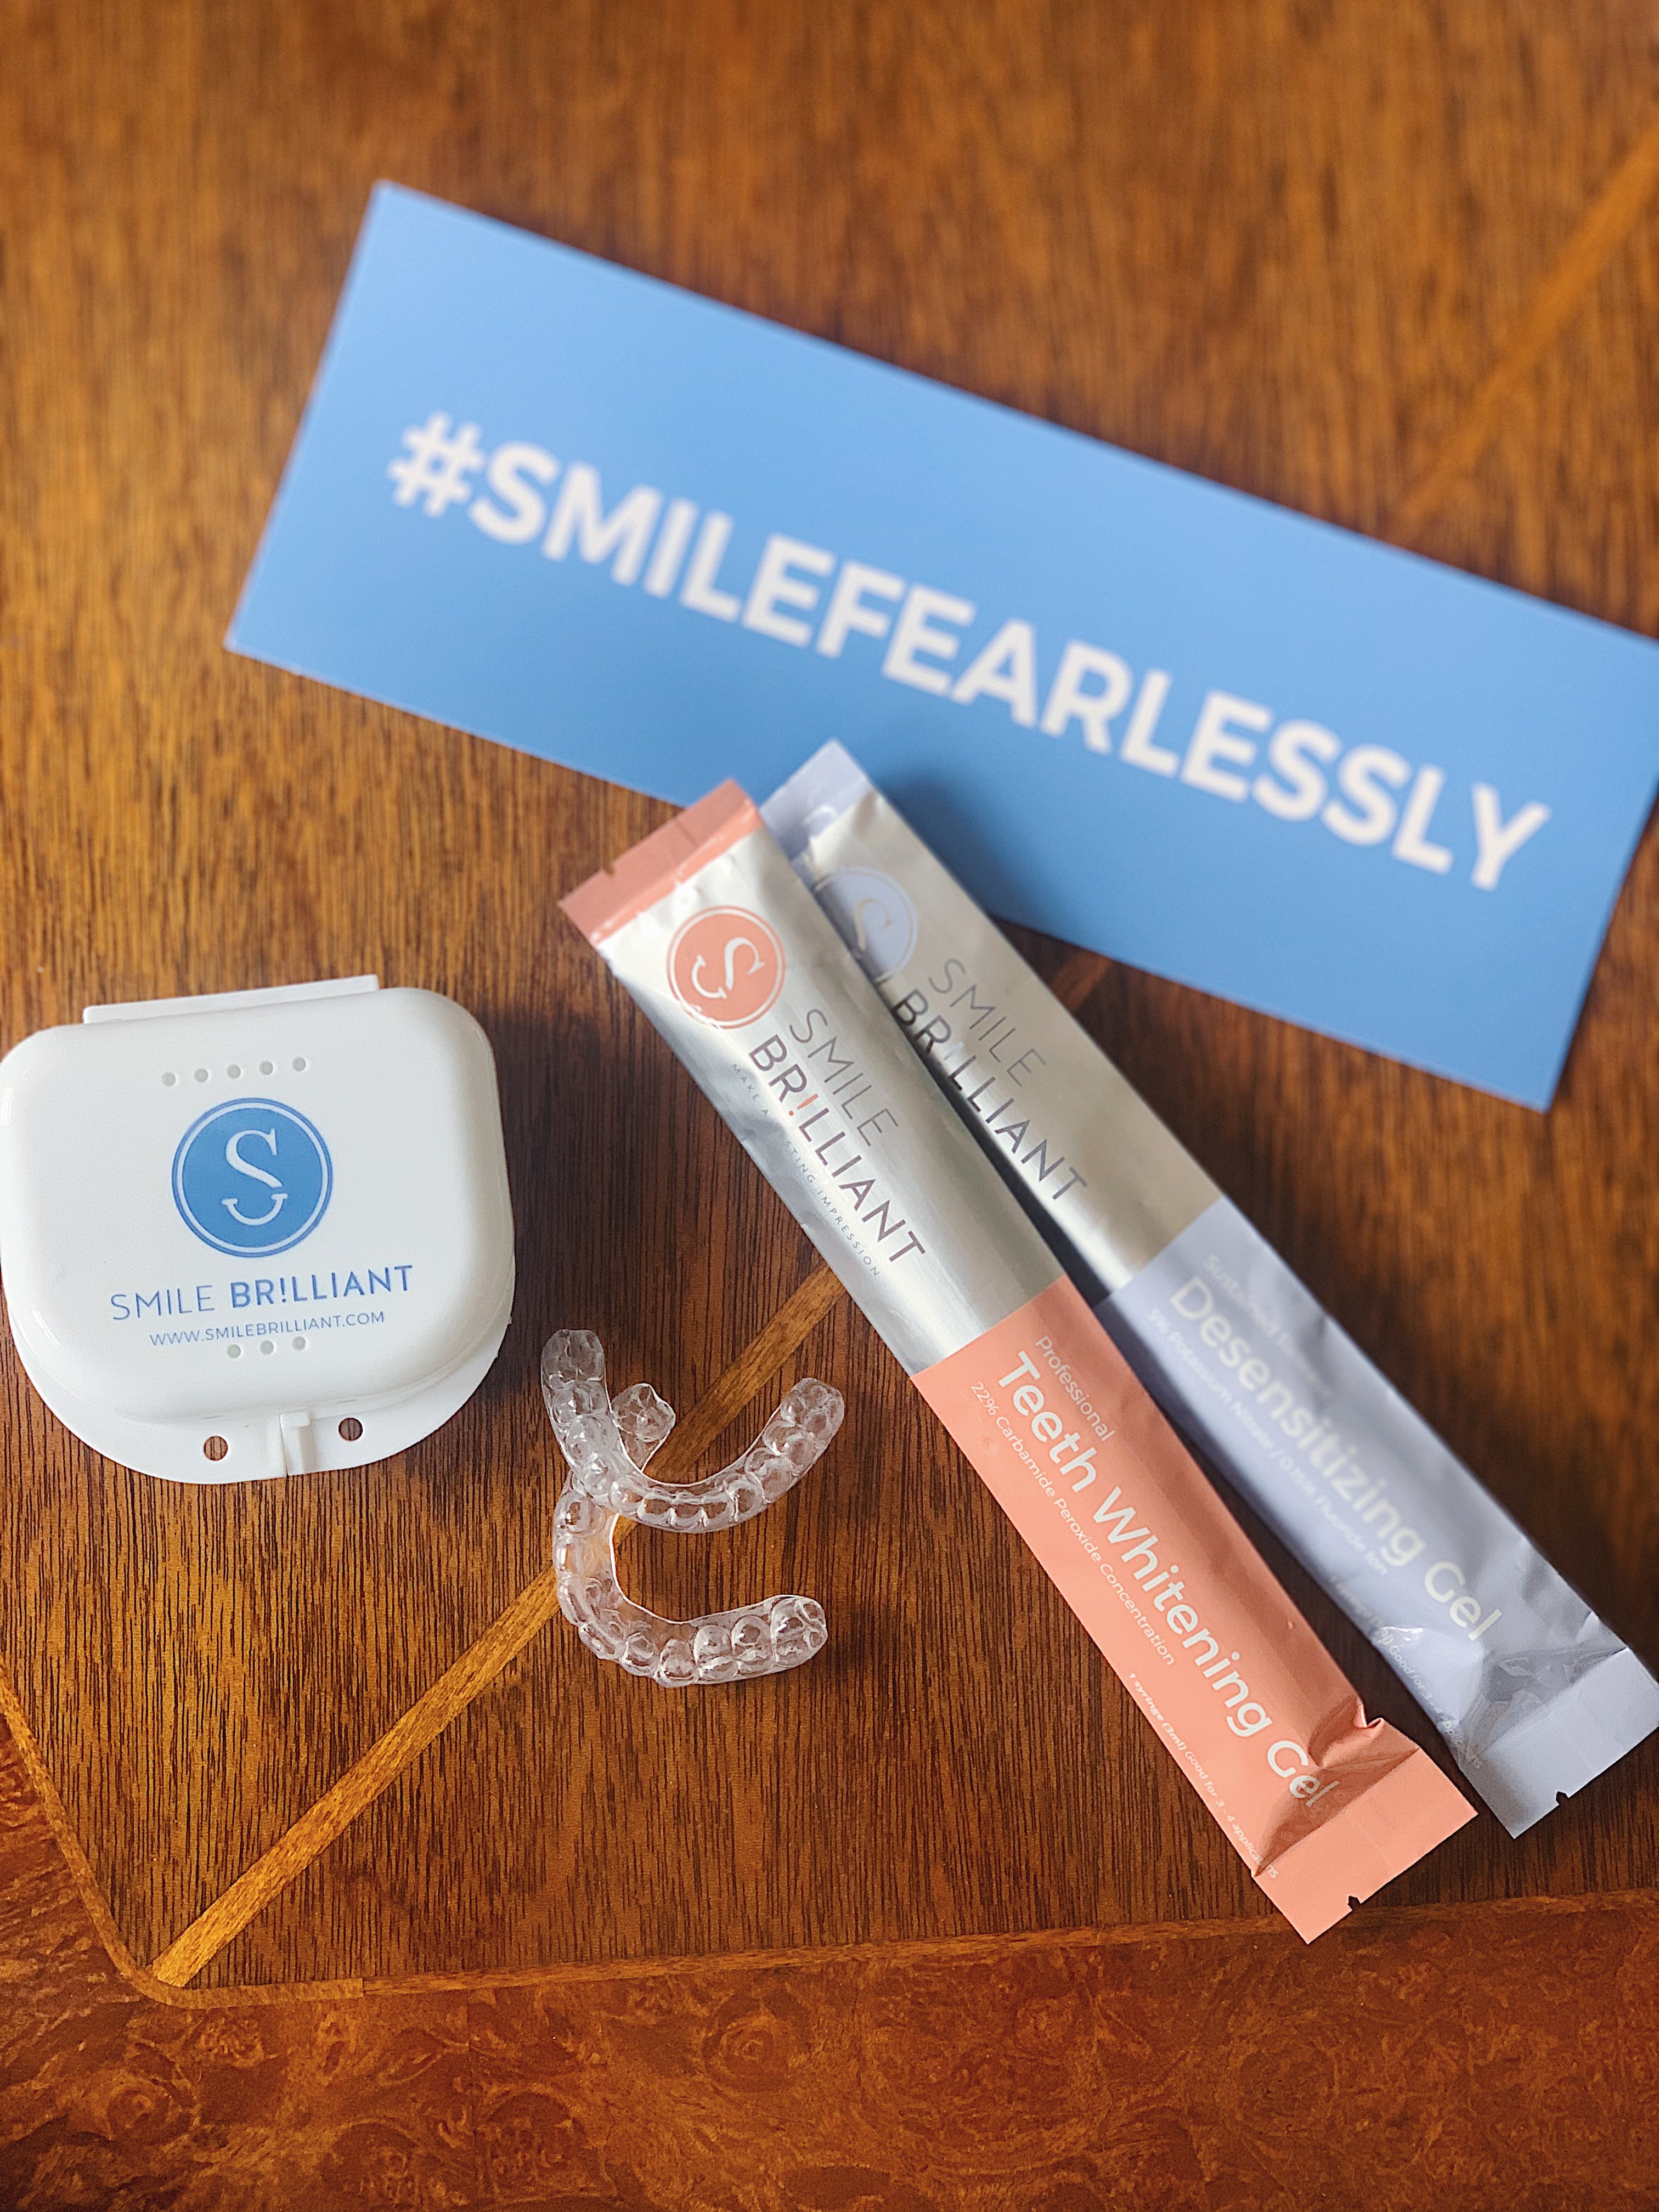
My history with whitening products? Previously, I used the Crest Whitening strips and haven’t had much luck with results because the strips didn’t stay in place! The Smile Brilliant trays are comfortable, discreet and work for people with sensitive gums.
You can try Smile Brilliant for yourself and get 15% off your purchase coupon code: geenicolette15
GIVEAWAY DETAILS*: Enter for the chance to win a $149 Smile Brilliant credit here.
*Open to residents in the USA, UK, Australia and Canada
Happy whitening!
XOXO,
Gee Nicolette
